if it looks like a duck prosciutto…

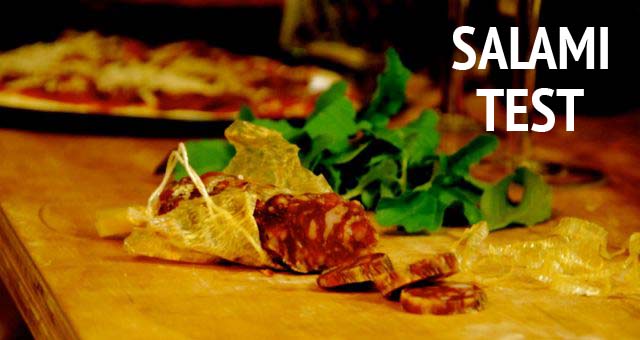
After the salami success of rigoniman, I wanted to have a go at meat preserving myself. But because I’m a bit lazy, I wanted something simpler and quicker. Also because of the risk; I didn’t want to put in effort and weeks of waiting for a dodgy result. And mind the squids too.

From the back of my brain I recalled reading about the charcutepalooza blog project, which I suspected might help me choose an entry level meat product. ELMP. I landed on duck prosciutto. How’s that for some weird imagery.

The suggested recipe by Ruhlman was heavy handed on the salt, so I went googling to find an option that didn’t mean I had to buy salt. I found a really simple one by this guy from Master Chef (whose restaurant I’ve actually been keen to visit because of his whole-beast philosophy). We  managed to have everything already in the house but the duck. The Queen Victoria Market helped with that.

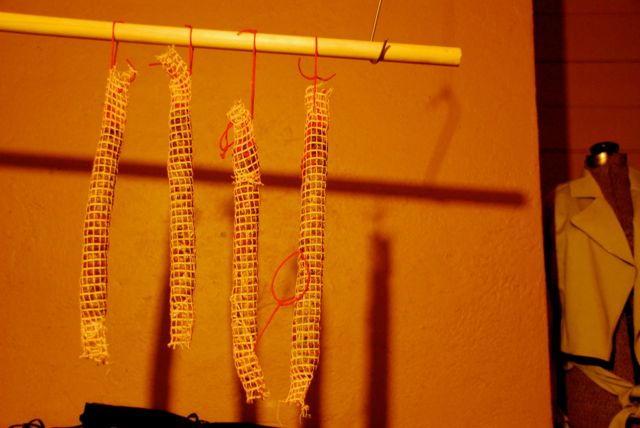
Making duck prosciutto is supremely rewarding in its simplicity.

There is something lovely about cheesecloth and kitchen string.

After a handful of days and many curious squeezes, we unveiled a most impressive looking pair of duck boobs.

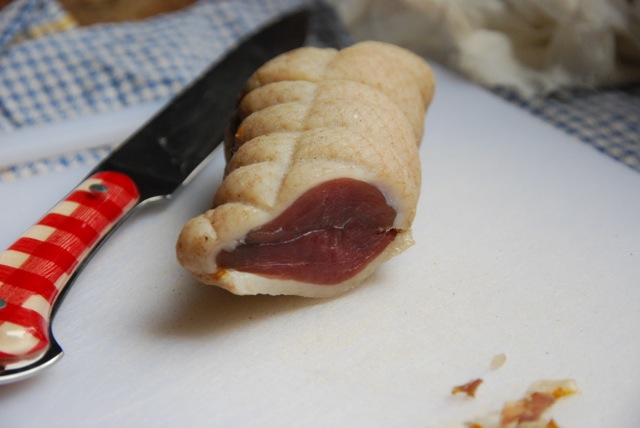
It looked right, it smelled right, it walked… No! It tasted right. I think. (Well, we’ve never eaten duck prosciutto before, so who knows.)

I have to be honest. I’m a little afraid if it. I only eat small portions at a time. It seemed suspiciously easy. The prosciutto smelt clean and meaty and spicy. We didn’t get sick, so that is an excellent result.

This is science though, so do your research and follow the rules! Trust the nose and be wary of any odd smells.

how to win at breakfast

breakfast

Some people wake up starving. With breakfast on the brain. Ready to fuel the body and start the day. Yay for them! But my first thought is backwards. I am all about, what time is it? Did I miraculously wake up before my alarm, do I still have three hours more to sleep?

Food is not an option for me in the wee, fresh hours of the morning. To be honest, it makes me feel a bit ill. This disappointing attitude strongly contradicts the rest of my day, where I am constantly looking forward to the next meal.

Past methods of dealing with this affliction have largely revolved around waiting until I get hungry and then buying something to eat at that point in time. But my options between 8-10 am are the kinds of naughty in-transit foods that are yes, delicious, but also Not Good For Me. And the money, right? (I’m looking at you, bacon and egg sandwich, ham and cheese croissant, and even you, virtuous-sounding-but-still-evil spinach and ricotta pastry).

In response to this pattern of grease and guilt, I did my research and can happily report that I have found my breakfast dreamboat. And that I have been loved up with this combination for a few months now.

It’s basically breakfast trifle, or parfait. It’s as simple as layering fruit-yoghurt-muesli. Ground breaking, no!?

But it’s one of those things where the whole is greater than the sum of its parts. And it meets my needs of:

  • Can be prepared the night before for maximum sleep in time
  • Is not disappointing compared to when it is served hot
  • Delicious and not unhealthy
  • Cheap to run

Let’s look closer.

VIP ingredient no. 1: Soul mate yoghurt. This is not the brand, this is what I have found after many attempts at finding a Goldy Locks yoghurt, i.e. not too tart, not too sweet, not too fat-free-y. Gippsland Smooth and Creamy Yoghurt. Winner. Find your soul mate yoghurt and insert here.

VIP ingredient no. 2: Delicious fruit. Be it fresh, canned, stewed, frozen. I won’t judge. I am currently alternating between stewed rhubarb from the in-laws garden, and frozen blackberries from last summer.

VIP ingredient no. 3: Muesli. I adapt Shutterbean’s recipe to whatever good things are hanging around our kitchen. This is seriously killer. The glazed nuts? Phwoar. My last batch was an Almond/Coconut/Cranberry.

Chop a couple handfuls of nuts and glaze in butter and whatever come to hand in the sticky-sweet category (honey, golden syrup, maple syrup, apple jelly) and a little vanilla essence or beans if you are lux.

Half a kilo of rolled oats. I will sometimes stir through a quarter cup of orange juice through the oats.

A handful of coconut and seeds you like, maybe sunflower, pumpkin, sesame. Mix these into the oats.

Spread thinly onto a baking tray and then experiment with times in your oven, check every few minutes until you have got it sussed. Mine likes 10 min at 150 C. Try not to wander off. It waits for you to do this so it can burn.

Let it cool, and then mix through the nut clusters and some dried fruit. Fig? Yes please. Peach or blueberry? Excellent. I don’t believe in sultanas.

the magical smell of quince

quince jelly

The hardest thing about making quince jelly is getting your face off the quince. Quince smells so good. It’s a bit silly how good it smells. I can’t think of a single, suitable word to describe it. Some people call it ‘floral’ but I’m not sure that’s enough.

quince and book

quince with the bloom rubbed off on the left, and still fuzzy on the right.

We found a kilo bag of quince going cheap at our grocer, and after checking it for that important and mysterious smell, and deciding that we can live with the few bruises it had, it was snapped up.

chop quince

After a few days of leaving the quince in the kitchen like a bunch of flowers, I decided to go ahead and make jelly.

But I fell for the same trick as usual. This is the trick where you think you will get heaps of jam and then you only get a few jars. I thought a kilo would make a reasonable output? No.  I got two jars of quince jelly. Two jars!!

[Sad trombone noise]

I’m almost positive that no jam recipe has ever yielded what it is meant to. How rude.

Look at all those empty jars. Pffft.

The paucity of my result is nothing against this recipe though. Because I should say I chose this recipe for a good reason. It is a real life recipe.

What I mean by real life recipe is this. When I buy bits of food in order to preserve it, I never seem to buy 1.7 kg of quince, or 4 cups of chopped quince, or 20 kilos of quince, or whatever our preserving books tend to arbitrarily demand. But this recipe, this wonderfully practical recipe, gives you a ratio of sugar to strained quince juice. And that sir, is the business.

(Just take it from me, and use more than a kilo of fruit).

Quince Jelly

straining

Variation on the Apple and herb jelly by Pam Corbin, River Cottage Handbook No. 2.

Ingredients are Just quince and sugar. (Check for the inimitable smell)

1. Chop up the quince. No need to peel or core.

2. Put in a pot for cooking jam in, cover with water. At this point you could add something like cinnamon or cloves if you wanted some spice flavour.

3. Bring to a boil, then simmer until fruit is nice and soft. For me with 1kg this was about 1.5 hours.

4. Strain and keep juice. If you have a jelly bag setup, go for it. Feed the quince scraps to your chickens.

5. Maths time.  Sorry, but this is where the ratio comes in. For each 600ml of liquid you have, get 450g of sugar.

6. Put the quince juice and the sugar back on heat, and return to the boil until reaching setting point. I like the wrinkle test best.

7. Pour into sterilised jars.  Probably not as many as you thought you would need.

We generally leave any preserves on a wooden counter, or bread board, at least overnight before moving them into the preserve cupboard. It’s something to do with getting a good seal. Haha. is it possible to use the word seal without imagining the marine seal? Nope.

preserve cupboard

Would you look at that. I always dreamt of having a cupboard full of preserves in beautiful colours.  Aim high in life!

we heart satay chicken

Bbq Ayam

Sometimes you just want grilled meat. And sometimes you want something a little more complex.

Sometimes you can’t make up your mind and you want both. Greeeeeeedy.

ceviche

In the process of bbq-ing some great meats recently, we decided we needed more. To mix it up a little. There was time to experiment while waiting for the perfect coals, so we each picked a dish. Rigoniman made some satay chicken (sate ayam) and I went with ceviche.

I was graciously allowed to squeak off a little piece of the tuna destined for the bbq. I let it briefly “cook” in lime juice, along with the best friends of chilli and coriander. Wrapped in some lettuce (that the snails and chickens had kindly neglected to eat) and we had a quick little snack. It was of course delicious (if I do say so myself) but the sate won out because, as well as having flavour, it had fire and sentiment attached.

You see, we met sate ayam in our travels to Indonesia last year where had such an awesome time. Since then we have undertaken a series of attempts to replicate it. Our enthusiastic and sustained efforts have produced excellent taste results. However. The chicken has absolutely no inclination to stay on the sticks and will obstinately fall into the fire if not carefully tended to. It’s needy, and wants lots of turning and attention. I’m sure there are tricks to this. We’ll keep trying. We used lemongrass for the sticks which was extravagant and unnecessary. But they look darling and you feel super authentic using them.

Our admiration for this dish was encouraged by three places in particular during our Indo holiday: 1. Made’s Warung, Seminyak, 2. Paon Bali cooking class, Ubud and 3. Moslem Booth, Lembongan Island. We stumbled into Made’s on our first night in Bali and couldn’t have been more pleased. They do a mixed plate if you can’t make up your mind and ours including some dreamy, spicy sate. I suspect it set the tone of our trip.

We are developing a habit of doing cooking classes when we travel and it’s the best fun and has often resulted in our favourite meals. If you ever find yourself in Bali, and don’t feel like getting drunk and sunburnt like everyone else, try to get to the Paon Bali cooking class run by Puspa and Wayan. It is a real cultural experience with an insight into family life in Indonesia as well as traditional cooking. They are lovely and hilarious people. But the food! Which is what we are all really interested in, right? Well, see here my plate with some of the good things we made? I ate it all. And soup. And dessert.

the spoils

We worked hard for our lunch, with plenty of chopping and stirring. There was a mega-sized mortar and pestle which Puspa referred to as the ‘Bali blender’. Ha!

sate fixing

Puspa’s assistants kindly fixed our efforts at sate shapes; no falling off the stick here.

Lastly, on the island of Lembongan, where we spent the bulk of our trip with massages and cocktails for company, we came across a simple road-side stall. The fire and the smell were calling to us. We quickly stopped our scooters and became mesmerised by the cooking meat. 10 sticks please.

Oh dear, I think it might be time to travel again.

moslem booth DSC_0090

Say Cheese –

say-cheeseWelcome to the first post in a series on cheese making, a topic much simpler than you might think. It’s the process of heating milk to the point that curds (the delicious fat solids) separate from the whey (the watery by-product). And I’m not talking about the curds couch-surfing at a mate’s place while the whey rips up all their old photos and changes the locks, I’m talking about bacteria, enzymes and acids. Using this process you can essentially make most other forms of cheese and I’ll cover this soon.

scooping the curds
What will I need to make cheese?
Some cheese requires specific equipment and we will cover this when the time comes, but for now let’s keep it simple, the basics you will need are:
  • Large pot (We use a 10 lt solid base pot)
  • Colander and/or cheese cloth (Cheese cloth is cheap and can be purchased in bulk from a sewing store)
  • Ladle or stirring spoon
.
Unless you have a cow, goat or other lactating animal that you’re prepared to harvest, it’s fine to use store bought milk. Yes, you can buy unpasteurized (Bath milk) but it’s whey too expensive. (That was my little joke). I have tried different brands of supermarket milk and there isn’t much of a difference, I personally use A2.
Whole Milk Ricotta is probably the easiest and it’s made from things you probably already have in your kitchen, here are the steps:
  • tempAdd 3 1/2 litres milk to a large pot on a medium heat.
  • Dissolve one teaspoon of citric acid in 50ml of water and add to milk with half a teaspoon of salt. Mix the milk thoroughly, you want to heat the milk but not boil it.
  • Stir often to prevent scorching.
  • Heat the milk to 85-90°C and as soon as the curds and whey separate turn off the heat and let it sit  undisturbed for 10 minutes.
  • Scoop the curds out and drain through a colander or cheese cloth.
  • The cheese is ready to eat immediately.
  • For a creamier consistency, add 1/2 cup of cream at the end and mix.

You can store in a covered container in the fridge for 1-2 weeks. I really do love cheese, even if it doesn’t always love me back. Try it in ravioli using our pasta recipe for dinner, even on toast for breakfast with a little chilli and avocado. What a way to start the day!

$100 Pizza Oven

$100-pizza-oven

I was hungry for pizza so I built a pizza oven, that makes sense right? As most of you might of gathered by now we like food an awful lot, especially baking and our, lets call it a “healthy” obsession takes up a good portion of our time. So when we heard the Melbourne Pizza Festival was coming to town we were sold on the idea. Mouth watering succulent pizza would be on offer and who are we to refuse, but sadly we only managed to get our mouths around just two slices and that just wasn’t quite enough to tame our wild stomachs. I’m not saying the festival or pizza wasn’t good, far from it, but unfortunetly for us they had failed to allow room for half of Melbourne to fit and so resulted in a very crowded venue, and a very hungry us. It was decided: we need a wood fired oven, but one that could be abandoned should the need arise due to our renting status, and it must be completed on a budget. Challenge accepted.

pizza-photo-stripThink of this as a first try; the pizza oven you build to hone your pizza oven building skills. If everything goes to plan over the next twelve months we will be moving on and buying our first home and a whole new oven will need to be built. 

The basics of an oven are somewhat simple, heat – in this instance from a fire and thermal mass – bricks and render (clay would have been a better for thermal mass but I’m lazy so render will do). The fire heats the oven and the bricks store the energy to be released and used to cook your pizza, bread, roast, whatever your appetite calls for. This oven was built with this in mind but on a budget, here we go…

Materials and Cost breakdown

5 Pallets – Donated
18 Cement paving stones – Had
180’ish Bricks (old clinkers) – Had
Chicken wire (about 2sqm) – Had
Chimney if required  – Had
Sand – $60 for 2/3 meter 
Lime – $10
Cement -$15

Total $85

With the fifteen dollars we had spare I’m going to buy a bottle of wine and christen her this weekend, results to come!

Instructions – The boring bit

The pictures are pretty self explanatory, I started with a base (pallets donated by a local builder) and then built up. I wanted to use some cement sheeting for insulation over the pallets but with the budget in mind I laid some old cement paving stones insteed, tightly layering them on the pallets. Then I mortared (MIX 4-1-1) in a line of bricks around the edge of the base and filled the centre with tightly packed sand. The sand was then covered with bricks that were persuaded into place with a mallet, the base is tightly packed but not set with mortar as it’s the baking surface.

Then I started laying my bricks, around and around leaving some room for an entry at the front. Using an old length of steel from our garden, I formed a lintel and set a terracotta arch on the lintel and continued to taper the brick dome inwards. From here I created a platform inside the dome and covered it with sand shaping the inside of the dome and giving the bricks something to rest on while being laid and then setting in place.

I added a length of chimney from the front of the dome, held in place with chicken wire which also helps to strengthen the structure. After a day I carefully removed the platform and shaping sand and then set to work rendering the facade, this not only looks nice but increases the thermal mass. The render is about the same mix as the mortar but with a little more lime for flexibility. Over the bricks I have a render layer then a sheet of chicken wire to aid with strength and topped with a smooth render layer. At its thickest point the oven would be almost twenty centimetres.
pizza
What could I have done different?
Well if money wasn’t an object, almost everything, but this amaizingly cheap project took me about six hours in total and came in under budget. I call success, now who’s for a slice of pizza?

backyard bbq (or, the weather outside is weather)

The small town that we live in is almost 600 metres elevated, and so we get a little more winter than others living around Melbourne. For the most part, this is exactly to our taste, and part of the reason we moved there. However, following a series of below zero temperature mornings, we welcomed a sunny-ish Saturday and made the effort to boost its warmth by lighting a fire.

And let’s face it, by having a little red wine.mixed meats

The fire-pit in our backyard gives us much joy. In the Australian tradition, it has been constructed from various bits and pieces that were not designed for that purpose. Ours for example, is a fine combination of brake drum, metal pipe and something that looks exactly like a grill plate, works like a grill plate (now smells like a grill plate) but isn’t! Gian Carlo forged it for us and we try to pay our respects to it regularly.

meat prepSo on this darling of a day, a quick trip to the local butcher yielded some excellent meats of the aquatic, feathered and land-based variety. We planned to do the simplest of bbq-ing and let the meat speak for itself. Pork ribs, eye fillet and tuna were grilled straight up.

I’m hoping the photographs do the talking here, because really, there isn’t much to say. Simplicity itself. There is just something about meat cooked on a bbq isn’t there? Of course, we didn’t manage to keep it entirely simple and ended up making a few ‘side dishes’, but more on that another time.

tuna, quick grilled and meltingly pink

tuna, quick grilled and meltingly pink

High five! St Johns, Alexandra

jam rule

Recognition where it’s due.

We’d like to high five the ladies at the St Johns Anglican Church fete in Alexandra, Victoria. They made a delicious Raspberry and Blood Plum Jam.

I have been waiting to open this jam since March because of the the 2 jam rule.

The 2 jam rule is, not suprisingly, that we are only allowed to have two jars of jam open at any one time. It’s not weird.  Things get out of hand quickly otherwise. Fridge space is very important real estate in our house. There have been murmurs to adapt this rule for chutneys… but that dog won’t hunt, monsignor.

A day off work, some of rigoniman’s fresh bread, some fancy French butter (naughty), and this jam. Happiness.

Everything You See I Owe To Spaghetti

pasta crop

One of the many benefits of having chickens is fresh eggs and there’s no shortage of uses, but one of Sophia Loren and our favourites is fresh pasta. For each person your going to need about one hundred grams of fine flour, we use the same flour I bake with (The aptly named – Bakers’ flour), you can substitute with plain flour but your pasta will be a little heavier. You will also need one free range egg. For each additional person add another hundred grams of flour and an additional egg. Here I have covered two methods, one is beautiful and authentic, the other is much quicker but more realistic,  you should definitely try both.

Option one

Lightly sprinkle the pasta length with flour and fold loosely in half, repeat and repeat taking care to keep it loose until you have a roll you can easily handle. Then with a sharp knife cut across the roll creating whatever pasta width you like, skinny for spaghetti, fatter for fettuccine, my personal favourite is a mix.

DSC_0052Pour a glass of red wine and consume; you need to get your head in the right place for this. Now sift one hundred grams of flour on your bench and make a well in the middle then add an egg into the well. With one finger or a fork start mixing in the flour, a small amount at first then continuing with your whole hand. You are looking for a light doughy consistency that’s almost sticky. If time permits, rest this dough in the fridge for an hour.

Option two

Add one hundred grams of flour and one egg to your food processor and pulse until the mix forms small grains. Test the consistency and add a small amount of water or flour if required.

Then

DSC_0584DSC_0063

Sprinkle some flour on your bench and divide your dough into halves. If you have a pasta roller then great, if not then pour another glass of wine. You could easily use a rolling pin but somehow the wine bottle feels more involved. Using the wine bottle roll your dough into long lasagne sheets adding an extra sprinkling of flour if it starts to stick. continue until your pasta is no more than one millimetre thick.

DSC_0064

DSC_0076


DSC_0087Half fill a large pot with water and add a good pinch a salt. Bring to the boil, but DON’T add any oil, many people do this and it’s a big no-no. The oil clings to your pasta and prevents your sauce and her beautiful flavour from coating and infusing its delicious flavours. Once the water has come to the boil add your pasta and stir occasionally until cooked, this takes less than five minutes so be on your guard.


Test your pasta, and once you’re happy it’s cooked, strain it and let drain for about thirty seconds, then after it’s dry pop back in the pot with a ladle full of your desired sauce and combine, serve (or pop the lid back on until you’re ready).

bon appétite.

DSC_0102


The Salami Test

salami tit

Some six weeks back Gian Carlo and I attended Salami School. Fine tuning our charcuterie skills was the aim of the day, but Gian Carlo was certain that getting his hands dirty would bring those long lost salami secrets flooding back to him from a childhood as a junior charcutier back in Italy. The day was incredible and a real culinary sensation, James our host not only welcomed us into his home but was more than happy to share his wealth of knowledge and if that wasn’t already enough he then organised a near 100 kilogram pig for for our own salami day the following weekend.

DSC_0604Our Salami day was also a massive success and our curing room is now bursting at the rafters. But with everything we produced still curing, we still have a couple more weeks before we can try our handy work. But the salami from Salami School requires no more waiting, which is good because we are only becoming more and more impatient, also a little hungry.
DSC_0620
The first test was done by Gian Carlo last weekend: a success he proclaimed. The second test was done by friends at the local brewery and as the whole salami was consumed in about twenty seconds I’m claiming this as a success as well. And the final test, I call it “The Pizza Test” – Excellent!