if it looks like a duck prosciutto…

After the salami success of rigoniman, I wanted to have a go at meat preserving myself. But because I’m a bit lazy, I wanted something simpler and quicker. Also because of the risk; I didn’t want to put in effort and weeks of waiting for a dodgy result. And mind the squids too.

From the back of my brain I recalled reading about the charcutepalooza blog project, which I suspected might help me choose an entry level meat product. ELMP. I landed on duck prosciutto. How’s that for some weird imagery.

The suggested recipe by Ruhlman was heavy handed on the salt, so I went googling to find an option that didn’t mean I had to buy salt. I found a really simple one by this guy from Master Chef (whose restaurant I’ve actually been keen to visit because of his whole-beast philosophy). We  managed to have everything already in the house but the duck. The Queen Victoria Market helped with that.

Making duck prosciutto is supremely rewarding in its simplicity.

There is something lovely about cheesecloth and kitchen string.

After a handful of days and many curious squeezes, we unveiled a most impressive looking pair of duck boobs.

It looked right, it smelled right, it walked… No! It tasted right. I think. (Well, we’ve never eaten duck prosciutto before, so who knows.)

I have to be honest. I’m a little afraid if it. I only eat small portions at a time. It seemed suspiciously easy. The prosciutto smelt clean and meaty and spicy. We didn’t get sick, so that is an excellent result.

This is science though, so do your research and follow the rules! Trust the nose and be wary of any odd smells.

$100 Pizza Oven

$100-pizza-oven

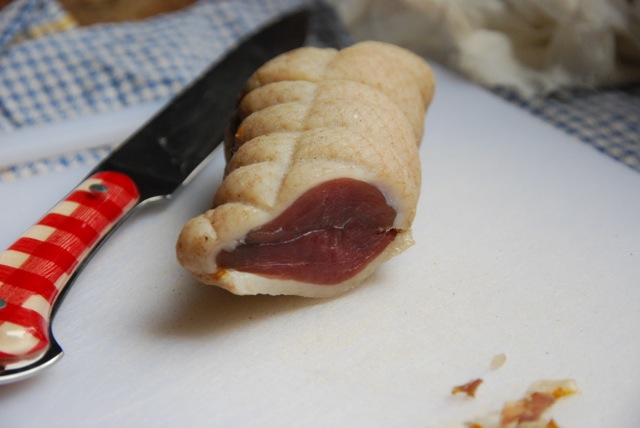
I was hungry for pizza so I built a pizza oven, that makes sense right? As most of you might of gathered by now we like food an awful lot, especially baking and our, lets call it a “healthy” obsession takes up a good portion of our time. So when we heard the Melbourne Pizza Festival was coming to town we were sold on the idea. Mouth watering succulent pizza would be on offer and who are we to refuse, but sadly we only managed to get our mouths around just two slices and that just wasn’t quite enough to tame our wild stomachs. I’m not saying the festival or pizza wasn’t good, far from it, but unfortunetly for us they had failed to allow room for half of Melbourne to fit and so resulted in a very crowded venue, and a very hungry us. It was decided: we need a wood fired oven, but one that could be abandoned should the need arise due to our renting status, and it must be completed on a budget. Challenge accepted.

pizza-photo-stripThink of this as a first try; the pizza oven you build to hone your pizza oven building skills. If everything goes to plan over the next twelve months we will be moving on and buying our first home and a whole new oven will need to be built. 

The basics of an oven are somewhat simple, heat – in this instance from a fire and thermal mass – bricks and render (clay would have been a better for thermal mass but I’m lazy so render will do). The fire heats the oven and the bricks store the energy to be released and used to cook your pizza, bread, roast, whatever your appetite calls for. This oven was built with this in mind but on a budget, here we go…

Materials and Cost breakdown

5 Pallets – Donated
18 Cement paving stones – Had
180’ish Bricks (old clinkers) – Had
Chicken wire (about 2sqm) – Had
Chimney if required  – Had
Sand – $60 for 2/3 meter 
Lime – $10
Cement -$15

Total $85

With the fifteen dollars we had spare I’m going to buy a bottle of wine and christen her this weekend, results to come!

Instructions – The boring bit

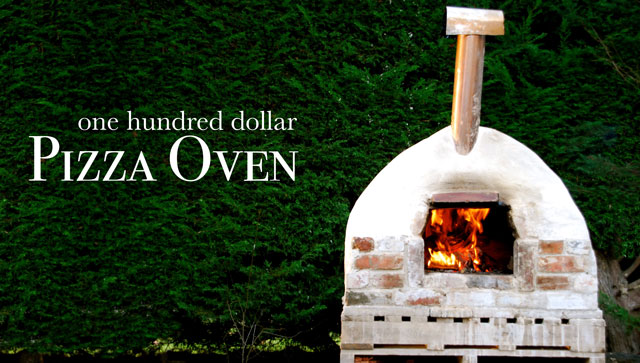
The pictures are pretty self explanatory, I started with a base (pallets donated by a local builder) and then built up. I wanted to use some cement sheeting for insulation over the pallets but with the budget in mind I laid some old cement paving stones insteed, tightly layering them on the pallets. Then I mortared (MIX 4-1-1) in a line of bricks around the edge of the base and filled the centre with tightly packed sand. The sand was then covered with bricks that were persuaded into place with a mallet, the base is tightly packed but not set with mortar as it’s the baking surface.

Then I started laying my bricks, around and around leaving some room for an entry at the front. Using an old length of steel from our garden, I formed a lintel and set a terracotta arch on the lintel and continued to taper the brick dome inwards. From here I created a platform inside the dome and covered it with sand shaping the inside of the dome and giving the bricks something to rest on while being laid and then setting in place.

I added a length of chimney from the front of the dome, held in place with chicken wire which also helps to strengthen the structure. After a day I carefully removed the platform and shaping sand and then set to work rendering the facade, this not only looks nice but increases the thermal mass. The render is about the same mix as the mortar but with a little more lime for flexibility. Over the bricks I have a render layer then a sheet of chicken wire to aid with strength and topped with a smooth render layer. At its thickest point the oven would be almost twenty centimetres.
pizza
What could I have done different?
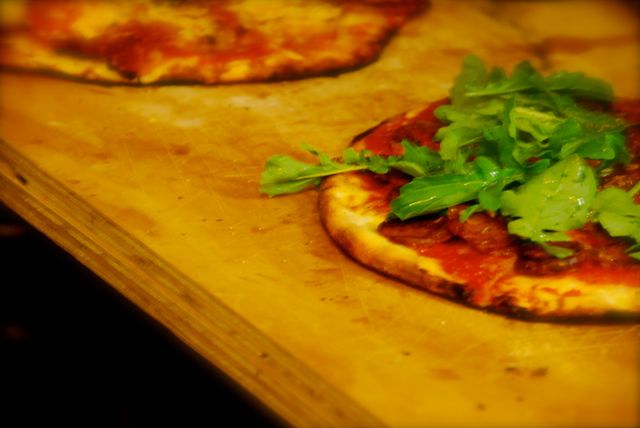
Well if money wasn’t an object, almost everything, but this amaizingly cheap project took me about six hours in total and came in under budget. I call success, now who’s for a slice of pizza?

The Salami Test

salami tit

Some six weeks back Gian Carlo and I attended Salami School. Fine tuning our charcuterie skills was the aim of the day, but Gian Carlo was certain that getting his hands dirty would bring those long lost salami secrets flooding back to him from a childhood as a junior charcutier back in Italy. The day was incredible and a real culinary sensation, James our host not only welcomed us into his home but was more than happy to share his wealth of knowledge and if that wasn’t already enough he then organised a near 100 kilogram pig for for our own salami day the following weekend.

DSC_0604Our Salami day was also a massive success and our curing room is now bursting at the rafters. But with everything we produced still curing, we still have a couple more weeks before we can try our handy work. But the salami from Salami School requires no more waiting, which is good because we are only becoming more and more impatient, also a little hungry.
DSC_0620
The first test was done by Gian Carlo last weekend: a success he proclaimed. The second test was done by friends at the local brewery and as the whole salami was consumed in about twenty seconds I’m claiming this as a success as well. And the final test, I call it “The Pizza Test” – Excellent!

Salami School

DSC_0158DSC_0227

The mornings are getting colder and I’ve pretty much made the switch from beer to wine, that’s a good sign that winter is just about here. The heavy yield garden crops of the warmer months are all but gone and so now we look for something different to preserve. Around the start of winter, usually the Queen’s birthday weekend most Italian families lock themselves away and convert their garages, sheds and kitchens into home butcher workshops; it’s salami season.

DSC_0176DSC_0165

The weekend just past was something of a test run and real treat, Giancarlo and I were able to attend an amazing day of butchery, cooking, charcuterie and most importantly coffee. Hosted near Kilmore, just north of Melbourne, in a converted stone building that anyone would be happy to have in their backyard we kicked off early and with an espresso in hand, James, our host proudly led us on a tour of his home, garden and backyard butchery. WOW!

DSC_0190DSC_0278

Organised by the Home Make It crew and the Salami Board (hosts of the massively successful Melbourne Salami Festa) we were in great hands and in my opinion they really nailed it. The day consisted of meat boning lessons – a guide on how to butcher a pig, mincing, mixing and spicing – getting the texture right is just as important as the spice mix and then a guide on filling and hanging salami.

DSC_0216DSC_0201

During the day we were treated to an amazing spectacle of food, wine and hospitality by our host, true to form from any Italian, and when it was time to go we were all sent off with our own salamis to hang as well as a few kilograms of pork sausage to cook. Most of us stayed well after the course officially finished, enjoying that day’s produce cooked in our host’s wood-fired oven all the while quaffing his chianti.

DSC_0232DSC_0264DSC_0243

From our new friend made this weekend we have already secured our own 130kg free-range sow and are planning our own full scale weekend of butchery and curing soon, stay tuned for the result.

DSC_0262 DSC_0256 DSC_0160 DSC_0237 DSC_0225 DSC_0224